The Update Assistant is a great tool to keep your Windows 10 consistently updated. But, people prefer permanently disabling the Windows 10 Update Assistant to avoid issues like system lag, slow performance.
Instead of smoothly upgrading Windows 10 automatically, the Update Assistant has miffed several users due to its problems. Growing number of Windows 10 Update Assistant issues is a major concern for Windows users across the world.
You should know the ways to effectively and permanently disable Windows 10 Update Assistant. Uninstalling or permanently disabling the Update Assistant is the only way to fix its problems.
Before you try out the different ways to permanently disable Windows 10 Update Assistant, get some info on what the tool is and why you need to uninstall it.
What is Windows 10 Update Assistant?
The Windows 10 Update Assistant is a new feature that comes with Microsoft’s newest operating systems. For some Windows 10 systems, the Update Assistant is a default service. You can also manually download and run the Update Assistant on your Windows 10 PC.
When you enable the Update Assistant, it runs a service that automatically downloads and installs new updates for Windows 10. Maintaining the latest version of Windows 10 OS is the purpose of enabling this tool.
Why Disable Windows 10 Update Assistant?
Sometimes, a tool that doesn’t seek your permission to download/install new software can mess up your PC. The issues with Windows 10 Update Assistant are somewhat similar to this dilemma.
There are multiple reasons why you should permanently disable Windows 10 Update Assistant. According to reports, the tool is unable to successfully install new updates. You may need to uninstall Windows 10 Update Assistant if it fails to serve its main purpose.
Other than that, some common cases of the Update Assistant causing problems on Windows 10 include–
- Windows 10 Update Assistant keeps reinstalling
- Windows 10 upgrade assistant is forcing windows 10 installations
- Update installation gets stuck at 99%
- You get an error message that reads – Updates fail to install
Also, not many Windows 10 users know that you can’t temporarily disable the Update Assistant. You can try closing the window, but the Update Assistant keeps running as a background service on Windows 10.
As a result, the tool takes up your RAM, processing power and other resources. Your Windows 10 PC gets exhausted with the constant downloading of new updates by the Windows 10 Upgrade Assistant.
Now, these reasons are enough for you to look for ways to disable Windows 10 Update Assistant permanently.
How to Disable Windows 10 Update Assistant Permanently
You may face similar issues when the Update Assistant on your Windows 10 system is enabled. So, here are a few ways to get rid of the tool for good.
1. Disable the Update Orchestrator Service
To be thorough with the removal on Windows 10 Update Assistant, you need to disable a few Microsoft background services first. You’ll begin with disabling the Update Orchestrator service.
The Update Orchestrator Service is responsible for managing the Windows 10 Update Assistant tasks. It schedules, selects, downloads and installs new updates for Windows 10.
To disable the Update Orchestrator Service,
- Go to the Start menu search box
- Type ‘ control ’ and open Control Panel from the search results
- Go to the Administrative Tool section
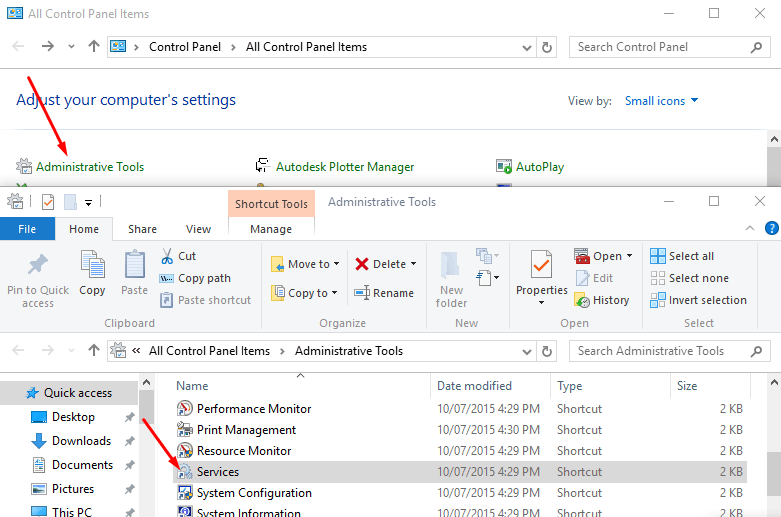
- Click on Services
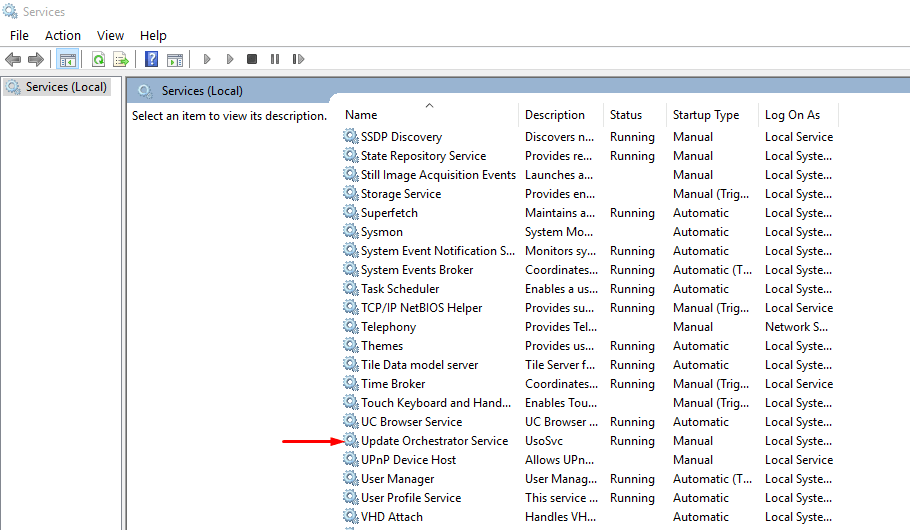
- Browse through the list and locate “ Update Orchestrator Service ”
The Update Orchestrator is a Local System service by default. So, you can select the service and temporarily disable it by click on the Stop button.
But, the service may still run the next time you open Windows Update. To permanently disable the service,
- Double-click on Update Orchestrator Service
- You see the Properties window for the service
- Go to the General tab
- In the Startup type field, select “ Disabled ”
- Click on OK to save the changes and exit
Now, you’ve effectively disabled the Update Orchestrator Service. In the absence of this service, the Windows 10 Update Assistant won’t be able to run itself.
You should also remember that once this service is disabled, you’ll not be able to update Windows 10 further. You may need to follow the same steps and enable it again to resume installing new updates on Windows.
2. Use a BAT file
You can also follow a command-line approach to permanently disable Windows 10 Update Assistant. In this method, you’ll use a BAT (batch file) to execute some commands and deactivate the Update Assistant in Windows 10.
First, you need to create the .bat file.
- Open a blank notepad on Windows
- Type the following script as it is in the file
@echo off
:Loop
taskkill /im Windows10UpgraderApp.exe /f
taskkill /im SetupHost.exe /f
goto Loop
- Save the file on the desktop as — Win10UpdateAsstKiller. bat
- Now, right-click on the file
- Click on ‘ Run as administrator ’
You may see the Command Prompt window throw up in a jiffy and close itself. Now, once the commands are executed, don’t delete or move this BAT file. You should also refrain from killing this .bat service with the Task Manager.
The advantage of using a BAT file is that it will keep disabling the Windows 10 Update Assistant whenever it tries to run in the background.
One of the major problems with the Windows 10 Update Assistant is that doesn’t get completely disabled. Whenever you run a program, the Windows 10 Update Assistant may start running as a background service.
With the help of this BAT file, you can keep killing the Windows Update service and disallow the Update Assistant from progressing.
3. Manually End All UpdateAssistant Tasks
If keeping this BAT file running as a background service is taking up a lot of RAM and processing power for your Windows 10, there’s an alternative.
You can manually close all UpdateAssistant tasks and services with the Task Scheduler.
- Type ‘ task scheduler ’ in the Start menu search box
- Open the Task Scheduler program from search results
- In the left pane , double-click on Task Scheduler
- Go to Microsoft , then Windows , and double-click on Update Orchestrator
- Select all tasks containing “UpdateAssistant” in their name (UpdateAssistantWakeupRun, UpdateAssistanceCalendarRun, etc.)
- Click on ‘ Disable ’ and stop them one by one
Make sure you uninstall the Windows 10 Update Assistant ( see solution 6 ) before using this method.
4. Make Changes in the Group Policy
The Group Policy Editor can permanently disable Windows 10 Update Assistant as well. Follow the steps below.
- Open the Run dialog (press ‘ Windows ’ key and ‘ R ’ key)
- Type “ gpedit. msc ” and click on OK
-
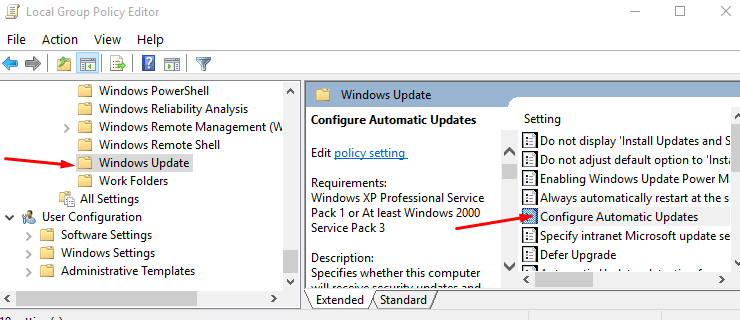
In the left pane, keep expanding the files and navigate to
- Local Computer Policy
- Computer Configuration
- Administrative Templates
- Windows Components
- Windows Update
- Here, you’ll double-click on “ Configure Automatic Updates ”
- In the new window, click on the ‘ Disabled ’ option on the left
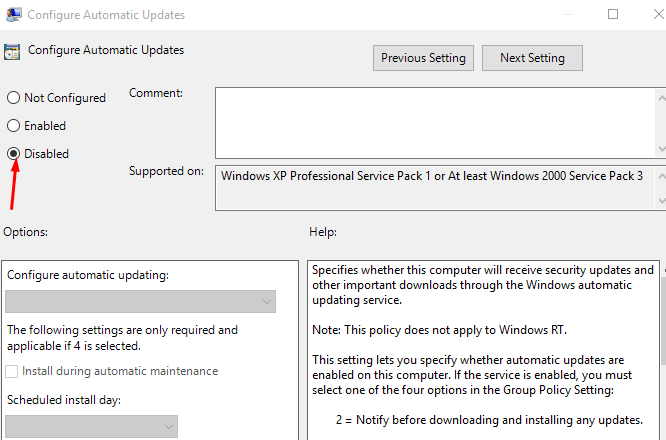
- Click on Apply and OK to save these policy changes
You can’t automatically undo these changes in the Group Policy. By applying these changes to the Local Group Policy on your Windows 10 system, you’ll be preventing it from automatically updating Windows hereafter.
5. Disable Updates with Device Installation Settings
There’s one way to permanently disable automatic update installation for your Windows devices and hardware.
- Open the Control Panel
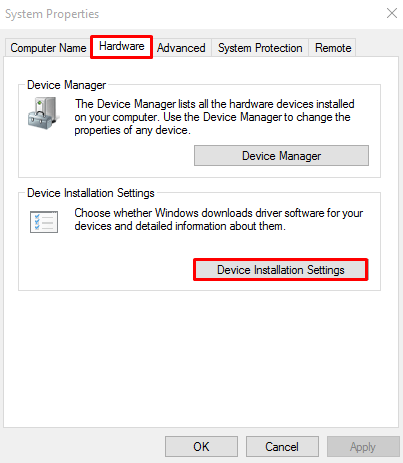
- Click on System -> Advanced System Settings
- Go to the Hardware tab
- Click on the Device Installation Settings button
- Select ‘ No ’ option and click on Save changes
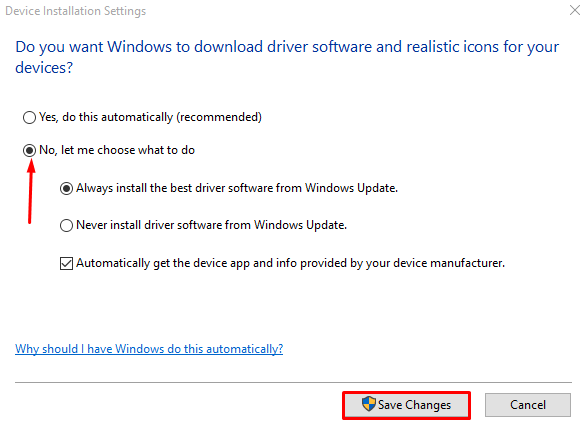
Now, your Windows 10 won’t run the Update Assistant to install new hardware upgrades automatically.
6. Manually Uninstall the Update Assistant
Finally, you can uninstall the Windows 10 Update Assistant with these simple steps. The methods presented above are ways to permanently disable this tool, but they don’t necessarily uninstall it.
A combination of this method and all the solutions presented above can help you permanently disable Windows 10 Update Assistant.
To uninstall Windows 10 Update Assistant,
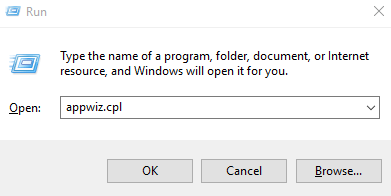
- Open the Run dialog (press Windows + R )
- Type “ appwiz. cpl ” and press the Enter key
- Select the Windows 10 Update Assistant
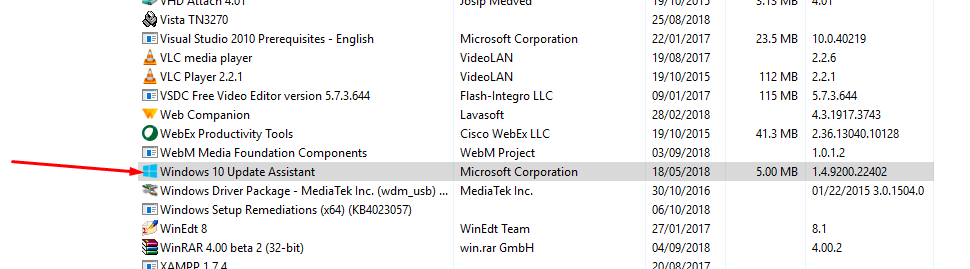
- Click on Uninstall
- Click on Yes in the prompts
To be thorough,
- Open the File Explorer window and go to C: drive
- Locate the Windows10Upgrade folder
- Select the folder
- Press Shift + Del key to permanently delete the folder
Now, reboot your PC and see if you still find the Windows 10 Update Assistant running in the background.
Also Read: