Nvidia graphics driver are facing problems on Windows 10/8/7 computers. Many users report that the Nvidia Control Panel won’t open.
All attempts to open the Nvidia Control Panel may prove futile if you don’t find out what’s causing this technical glitch. So, let’s go through a couple of fixes for this ‘Nvidia Control Panel not opening’ problem.
1. Check for Driver Updates
The key reason why Nvidia’s Control Panel won’t open on Windows 10 is the outdated graphics driver. You can avoid this problem by keeping Nvidia’s graphics drivers up to date.
If you don’t prefer running Windows Update, you can manually install the latest versions of Nvidia’s graphics driver. To install latest updates for Nvidia graphics driver,
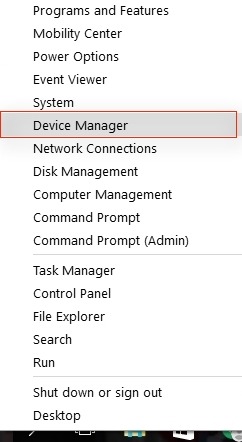
- Go to your Start menu
- Type ‘ device manager ’ in the search box
- Now, open the Device Manager program from the search results
- Click on ‘ Display Adapters ’ from the device list
- Expand it and double-click on your Nvidia Graphics Adapter
- Now, go to the Driver tab
- Click on the ‘ Update Driver ’ button
- A new window pops up
- Here, select the option that says – Search automatically for updated driver software
- Your Windows automatically checks for updates and installs them
- Once the process is complete, click on Close
- Now, close the Device Manager window
- If you see a prompt asking you to restart your PC, click on ‘ Yes ’ and restart Windows
If the “Nvidia’s Control Panel not opening” problem stems from outdated driver issues, this fix can surely do the job for your Windows 10.
2. Re-Run Nvidia Control Panel Process
There are a few more reasons why Nvidia’s Control Panel fails to open on your Windows 10 PC. In some cases, the Control Panel may open but fail to launch. Here, you need to stop the process and re-run it.
- Press the shortcut keys to launch Task Manager ( Ctrl + Shift + Esc )
- Go to the Processes tab
- Search for a process called ‘ nviplui.exe ’
- Right-click on it and select ‘ End Task ’
- Now, do the same for others Nvidia processes like ‘ nvxdsync.exe ’
- Close the Task Manager
Now, go to your Windows 10 desktop and try to open Control Panel again. If this fixes your problem, terminate all Nvidia processes running in the background the next time you want to launch Control Panel on your Windows computer.
3. Reinstall Nvidia Drivers
Sometimes, users can open the Control Panel, but the program doesn’t respond. To fix this, you need to reinstall Nvidia drivers.
If updating the Nvidia graphics drivers (see #1 ) didn’t fix the problem, you can remove and re-install them to sort things out.
To reinstall Nvidia drivers,
- Open the Device Manager program (as shown in #1 )
- Go to the list of devices
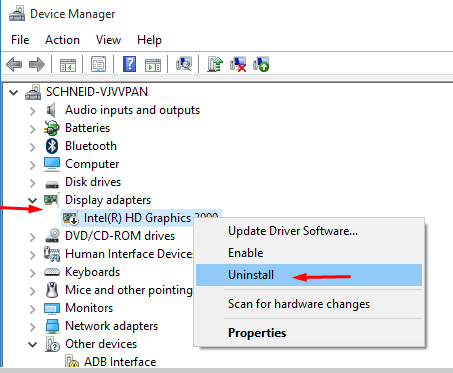
- Expand the section for Display Adapters
- Now, right-click on the Nvidia driver and click on Uninstall
- Put a tick on the checkbox for – Delete the driver software for this device
- Now, click on OK to completely remove the driver
Now, visit the Nvidia Driver page, search for your graphics card drivers and download them. Make sure you select 64-bit version of your Operating System from the options.
Open the Download folder on the File Explorer window and install the .exe driver file. When the installation/setup wizard launches, you need to select ‘ Custom Options ’ and click on ‘ Clean Install ’.
After the re-installation is complete, restart your PC. Your Windows computer automatically loads the newly-installed drivers. Now, try opening Control Panel to see if this fixes the problem.
Ideally, you should keep the drivers on your Windows system updated at all times. If you don’t want to keep reinstalling them, you can try running Windows Update from time to time.
BEST PRACTICE
Run Windows Update
- Go to the Start menu
- Click on the gear icon to open the Settings menu
- Now, go to the Update & Security section and click on it
- Here, click on ‘ Windows Update .’
- Click on the button that says Check for Updates
- Now, Windows 10 scans for new updates and automatically installs them
- This process may take up a few minutes
- Now, click on the Restart Now to reboot your PC
4. Tune Up Your Display Resolution to Maximum
It can be a case that due to some misconfigurations caused by Nvidia, the Control Panel’s not working. If you set your display to high resolution, it can fix the ‘Nvidia Control Panel not responding’ issue.
Well, low-resolution displays may stop Nvidia’s Control Panel from launching. So, tuning up the display resolution can potentially be a fix to this problem.
To set the high resolution for your Windows display,
- Right-click on an open area on your desktop screen
- Click on Display Settings from the drop-down menu
- Under the Scale and Layout section, change the resolution to a value higher than the current one
That’s it, there’s no simpler fix for this problem than resetting the display resolution. If the Nvidia Control Panel’s not opening on Windows 10 despite, you can try out some more fixes listed below.
5. Use Nvidia Display Driver Service
The Display Driver Service by Nvidia is responsible for launching the Control Panel. Hence, you can use the service to restart the Nvidia Control Panel and fix this issue.
- Press ‘ Windows ’ and ‘ R ’ key to launch the Run application
- Here, type ‘ services.msc ’ in the dialog box
- Click on OK to launch the Services window
- Now, look for Nvidia Display Driver Service from the list of services
- Double-click on it
- Change the Startup type, make it ‘ Automatic ’
- Now, start the service again (in case it’s been stopped)
You should repeat this for other Nvidia-related services you see in the Services list. After closing the Services window, try to open Nvidia Control Panel once again. See if this has fixed the problem for you.
6. Install Latest Versions of Visual C++ Redistributable and .NET Framework
Some Nvidia applications, like the Control Panel, run on Microsoft’s software packages such as the .NET Framework and Visual C++ Redistributable. If these software packages aren’t updated, they can stop the Nvidia Control Panel from opening on your Windows system
You can install the latest versions of these packages to fix the issue. Go to the link below to download the latest software packages for Visual C++ Redistributable and .NET Framework from Microsoft.
https://support.microsoft.com/en-us/help/2977003/the-latest-supported-visual-c-downloads
7. Fix with Registry Editor
There’s a complicated way to fix this issue. If none of the above solutions fix the ‘Nvida Control Panel not opening in Windows 10’ issue, try using the Registry Editor.
You can modify your registry to fix the problem that stops the Nvidia Control Panel from launching on your Windows computer. To do this,
- Open the Run program (press ‘ Windows ’ and ‘ R ’ keys)
- Type ‘ regedit ’ in the Run box and press the Enter key
- You may get asked for UAC access , click on ‘ Yes ’ to accept it
- Now, in your Registry Editor window, navigate to – HKEY_CLASSES_ROOT\Directory\Background\ContextMenuHandler
- Then, search for ‘ NvCplDesktopContext ’
- Right-click on it and click on Delete
- Now, navigate to HKEY_CLASSES_ROOT\Directory\Background\shell
- Here, right-click on Shell
- Select ‘ New ’ and go to Key with the name ‘ Nvidia Control Panel ’
- Right-click on it, go to New and add a Key with name ‘ command ’
- Now, double-click on the default value
- Put ‘ C:\Windows\System32\nvcplui.exe ’ in the value data field
- Click on ‘ OK ’
After finishing this edit, close the Registry window and restart your PC. Try to open Nvidia Control Panel to check if this worked for your PC or not.
NOTE: Make sure that you backup your registry before trying out this fix.
8. Disable Quick Boot
If Nvidia Control Panel won’t open on your Windows 10 PC, despite trying all the above solutions, you can try turning off quick boot. Some Windows 10 users reportedly fixed the issue by disabling the Quick Boot feature.
- Shutdown your system
- Restart it and when the startup window gets displayed, press the F2 or Delete key to open the BIOS (Basic Input/Output System) menu
- Now, look for the ‘ Quick Startup ’ or ‘ Quick Boot ’ feature
- Turn it off
- Save the changes and Exit
Disabling the Quick Boot feature may fix the issue. It can stop third-party drivers from interfering with Nvidia’s services and drivers.
Let us know which of the fix shown above helped you out by commenting below.
Read Next:
- Fix: Unable to Connect to Nvidia
- How do I Fix “NVIDIA Installer Cannot Continue” Error in Windows 10/8/7?
Rahul
September 6, 2018 at 1:28 amThanks a lot. I tried these steps and it worked.
jugal
January 17, 2019 at 3:13 pmDownload the latest driver and install.