If you have a Windows 10 computer, it certainly contains the dwm.exe file. It is a primordial process that keeps accompanying every Windows versions, year after year.
If you’re wondering what is a dwm.exe file , it is known as the Desktop Window Manager process. It is among the oldest Windows Service and operating system process that supports your computer’s display.
Despite being a core process, the dwm.exe file continues to put Windows 10 users in distress. Many users have reported dwm.exe errors that put a halt to their desktop experience.
Here are eight unique ways on how you can resolve all dwm.exe issues on Windows 10.
DID YOU KNOW?
Due to recurring issues, several Windows 10 users believed that the dwm.exe is a virus. Well, it is a critical Windows Service that can get easily infected by Trojans, bugs and malware programs.
Nonetheless, the dwm.exe file is not a virus. You can fix the Desktop Windows Manager process instead of deleting the file. If you delete the dwm.exe file, your Windows display starts running problems – which can’t be solved later.
Simple Ways to Fix DWM.exe Errors in Windows 10
Before trying out these solutions, make sure your Windows 10 is updated. Check for updates, install them, and restart your computer.
Try out the following methods to solve dwm.exe errors in Windows 10.
1. Adjust Performance Settings or Change Wallpaper
Your current performance settings may be the primary reason causing dwm.exe issues. When you reconfigure your system’s performance, the dwm.exe process runs smoothly.
To adjust performance settings,
- Go to the Search box near the Start menu icon
- Type “ performance ” in the dialog box and press the Enter key
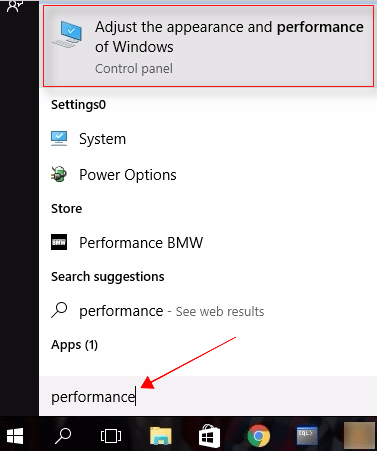
- Open ‘ Adjust the appearance and performance of Windows ’ with a double-click
- This opens the Performance Settings window
- Click on the Visual Effects tab
- Tick the checkbox – Adjust for best performance
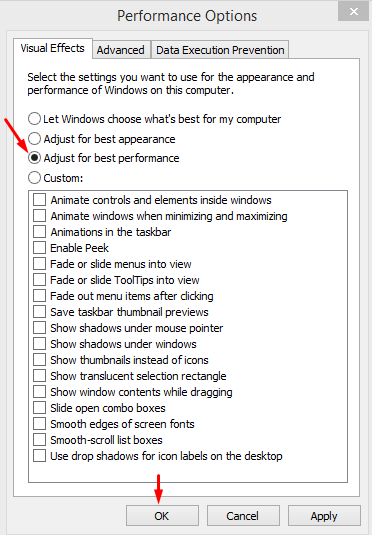
- Save the changes
Restart your computer to put these changes into effect. The dwm.exe process accepts these changes and overcomes its issues automatically.
You can also go for an unlikely solution; changing the desktop wallpaper and screensaver.
The Desktop Windows Manager process is responsible for avoiding the opened File Explorer windows get affected by desktop wallpapers or screensavers while cascading.
If your current wallpaper affects the dwm.exe process, changing it can resolve it likewise.
To change the wallpaper or screensaver of your Windows 10 desktop,
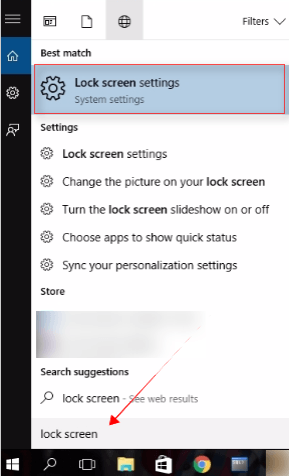
- Go to the search box and type “ lock screen ”
- Press the Enter key and open Lock Screen Settings window
- Go to ‘ Screen Saver Settings ’ link from the window
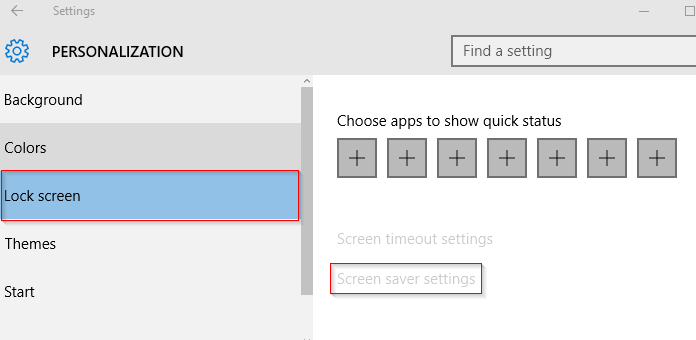
- Under the Screen Saver header, click on ‘ <None> ’ from the drop-down menu
- Save these changes
You need to restart your computer to allow Windows to adopt the new wallpaper and screensaver. Check if this fixes the problem.
2. Install Different Graphics Card Drivers
Your Windows 10 system could be equipped with advanced graphics cards that are too hard for the dwm.exe process to handle. Latest Nvidia drivers, in particular, cause the dwm.exe process to fail.
Perhaps, using different graphics card drivers can solve this problem. You can also install older versions of Nvidia graphics card drivers to stop dwm.exe from crashing.
To scale down a Windows 10 graphics card driver,
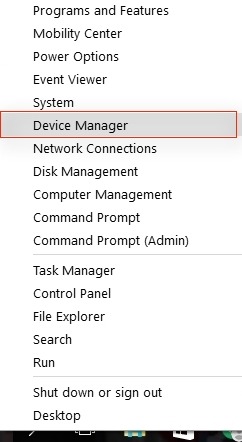
- Press the shortcut keys Windows and ‘ X ’ to open the Power User Menu
- Select “ Device Manager ” from the dropdown list
- Locate the current graphic card driver from the list of programs displayed in the Device Manager window
- Double-click on it and open the Driver Settings window
- Click on Options from the File menu
- Go to Advanced tab in the Options window
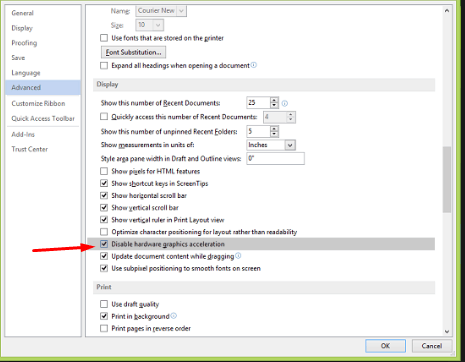
- You need to tick the checkbox for – Disable hardware graphics acceleration
- You have successfully allowed the graphics card driver to rollback to a previous version. You can follow the same process to scale down the driver for integrated Intel HD 4000 graphics card.
3. Disable Flash Extensions on Chrome
For Windows 10 users, the dwm.exe process can crash due to Chrome extensions. This happens rarely, but a Chrome flash extension can crash the Desktop Windows Manager by disabling some of its functions.
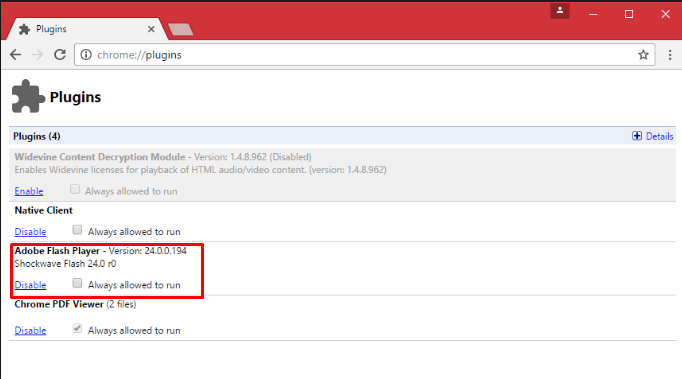
You should disable the Chrome Pepper Flash extension, in particular, to solve this issue.
- Open Chrome on Windows 10
- Type “ chrome://plugins ” in the address bar
- Press the Enter key
- You’ll see a list of active plug-ins
- Look for Chrome Pepper Flash from the list
- Click on ‘ Disable ’
This way, your Chrome flash extensions won’t affect the dwm.exe process and avoid its crashing.
4. Turn Off Hardware Acceleration for Microsoft Office
There are several reasons that can cause the dwm.exe process to fail. One key reason is an inbuilt Windows Service or Microsoft program interfering with the Desktop Window Manager process.
Microsoft Office, in particular, has been a cause of dwm.exe errors in several instances. Windows 10 users using Microsoft Office encounter the dwm.exe issues when the software’s hardware acceleration interferes with this Windows Service.
When you disable the hardware acceleration of Microsoft Office programs, the Desktop Window Manager process doesn’t encounter interference.
Here’s how you do it:
- Go to Start menu on Windows 10 and click on it
- Navigate the list of programs and click on Microsoft Office
- Open any Office program – let’s say Microsoft Word
- In the Word window, click on the File button
- Click on Options from the File menu
- Go to the Advanced tab in the Options window
- You need to tick the checkbox for – Disable hardware graphics acceleration
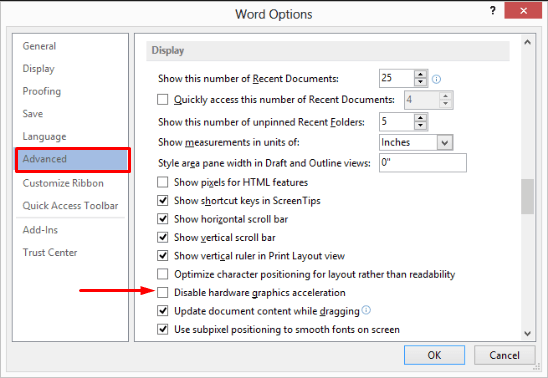
This way, you’ve disabled the hardware acceleration of Microsoft Word. You can follow the same procedure and disable hardware acceleration for PowerPoint, Excel and other Microsoft Office programs.
There’s another way to disable hardware graphics acceleration for Microsoft Office programs.
- Click on Start menu in Windows 10
- Go to the Search dialog box and type “ regedit ”
- Press the Enter key and click on the Registry Editor program from the search results

- After you open the Registry Editor, go to the left pane of the window
- Navigate to the following key: HKEY_CURRENT_USER\Software\Microsoft\Office\16.0\Common
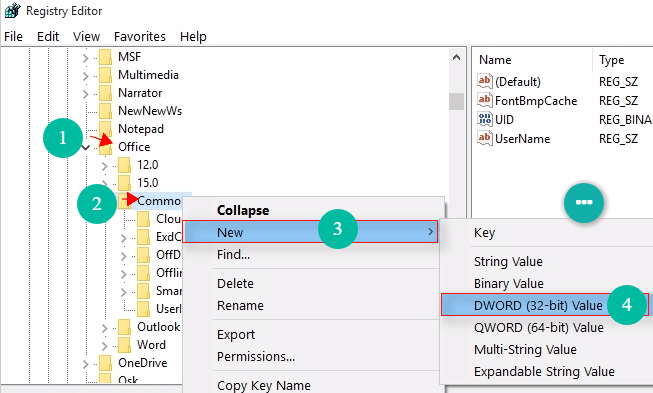
- Right-click on the Common key, choose New and select the Key option from the menu
- Enter the name of new key as “ Graphics ”
- Right-click on the “ Graphics ” key, go to New and select DWORD (32-bit) Value
- Name this new value as “ DisableHardwareAcceleration ”
- After setting the value, double-click on it and set the Value data to 1
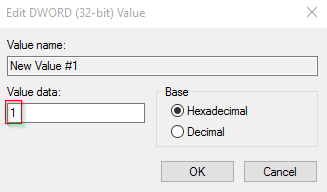
- Save the changes by clicking on OK
Close the Registry Editor. Check if this has resolved the dwm.exe file errors.
DID YOU KNOW?
Your Desktop Windows Manager process encounters interference from other non-Windows and non-Microsoft programs as well. Third-party anti-virus software can cause problems by tweaking the Windows Defender and Windows Firewall settings. The dwm.exe file gets infected with malware. You can uninstall such anti-virus easily. Go to Settings ->Apps -> select the Anti-virus from the list of programs -> Click on it -> select Uninstall.
5. Fix Broken Images with DISM
If the above methods didn’t work, you can try troubleshooting tools. Deployment Image Service Management (DISM) is a troubleshooting tool that can repair broken system image files.
To fix the dwm.exe issues, you can run DISM scan and deploy repair work for broken and fragmented system image processes.
- Type “ cmd ” in the Search dialog box and press the Enter key
- Click on Command Prompt program from the search results and open it
- In the Command Prompt window, you need to type the following commands one by one and press the Enter key after each line
DISM /online /Cleanup-Image / ScanHealthDISM /Online /Cleanup-Image /RestoreHealth
Wait for the procedure to end, and close the Command Prompt window after 10 minutes. Restart your PC and see if you’re still facing any dwm.exe issues.
6. Remove the mdi264.dll
Unknown files can interfere with the Desktop Window Manager process as well. In Windows 10, users face dwm.exe errors when a file named mdi264.dll gets created in the source destination.
An advice – delete the mdi264.dll file to stop dwm.exe from crashing.
To remove the mdi264.dll file,
- Click on the Start menu button and press-hold the Shift key
- Click on the Restart button
- Let your computer shut down and restart normally
- After you’ve restarted Windows 10, go to Troubleshoot program from Start menu
- Open it and click on “ Advanced options ” tab
- Click on “ Command Prompt ”
- Enter the following commands one by one in the Command Prompt window and press the Enter key
C: cdUsersEliasAppDataLocalTemp
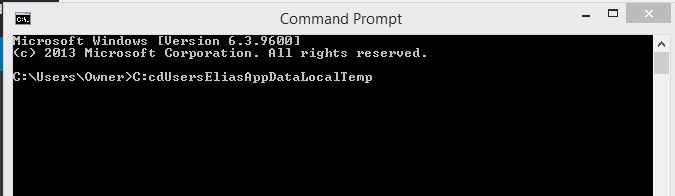
del mdi264.dll
This deletes the mdi264.dll file from your PC and allows the Desktop Windows Manager file to run smoothly.
7. Run the SFC Scan
The best troubleshooter tool to fix dwm.exe tools is the System File Checker (SFC) scan. It deeply analyzes all files and repairs the corrupted ones.
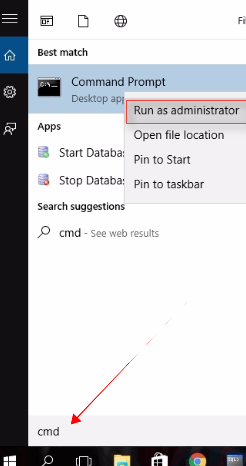
- In the Search dialog box on Windows 10, type “ cmd ” and press the Enter key
- Right-click on Command Prompt program from the search results
- Click on “ Run as Administrator ” from the drop-down menu
- Type the following command in the Command Prompt window
sfc /scannow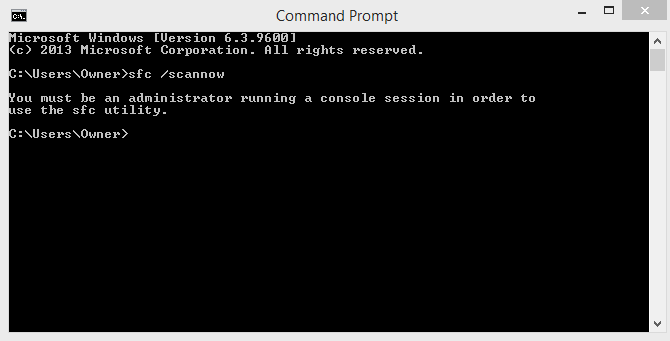
- Press the Enter key to execute the program
It may take a few minutes to half hour for completing the SFC scan. After the process is finished, the SFC scan reveals corrupted files and informs you about the repairs.
Close the Command Prompt window and restart your computer to put the repairs into effect.
8. Use Performance Troubleshooter
Your last resort is using the Windows 10 Performance Troubleshooter. It is a great tool to diagnose the dwm.exe errors and detect the cause.
Windows’ Performance Troubleshooter can fix the Desktop Windows Manager process by lowering its memory consumption.
- Open the Command Prompt program by right-clicking on it and selecting “ Run as Administrator ”
- Type the following command and press the Enter key
msdt.exe /id PerformanceDiagnostic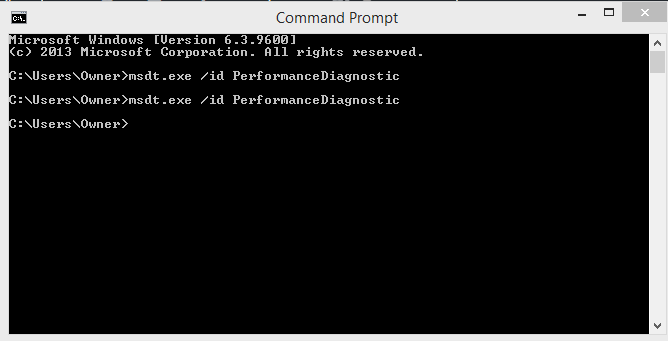
- Let the command execute and finish
Restart your computer later, and check if the dwm.exe file is facing errors. Out of all the above methods, your Desktop Window Manager process will be resolved most certainly.
BEST PRACTICE
You can avoid dwm.exe file errors by keeping your Windows 10 system completely updated.
Type “ Windows Update ” in the Search box and open the window for Windows Update and Security Settings. Click on Windows Update>Check for Updates>Install . Restart your computer after installation completes.
You need to check for updates from time to time and install the important ones. You can also install the recommended updates and allow your system to configure them effectively by restarting.
Read Next
- What is dwm.exe? Is It a Virus? Can You Disable It?
- What is dwm.exe (Desktop Window Manager)? How to Fix High CPU Usage by dwm.exe?