Every Windows 10 user needs the Windows Store app to install apps or games. This makes Windows Store highly-essential for Windows 10 operating systems.
In several cases, a common problem affects your experience with Windows Store. You see an error saying Windows Store Cache May be Damaged .
Potential problems such as damaged cache files can put a stop on the use of Windows Store. You are unable to install new apps and games. Eventually, your Windows 10 system becomes dormant in terms of user experience.
This problem is a critical one, and you need to solve it ASAP. Before you learn how to fix the damaged Windows Store cache files, here’s a take on what causes this error in the first place.
When Do You Face the “Windows Store Cache May Be Damaged” Error?
When you open Windows Store, are you seeing a message that reads “Windows Store cache may be damaged”? This error occurs when you try in to install an app or game, or check for/install app updates.
Well, there are several reasons why you’re facing this issue.
- Firstly, your Windows Store cache might be broken . The damage happens when the cache gets created automatically. If you are using Windows Store for installing an app and abruptly close the program, the cache file gets broken.
- Your Windows Store license gets corrupted . This reason is prevalent among Windows 10 users. You need to check if you’ve run out of valid Windows Store license before using the application.
- Sometimes, Windows 10 protocols allow users to create Windows Store cache manually . When you do that, the Store is unable to register the cache folder location. Your cache files get damaged.
- Have you created a new user account ? When you set up a new user account on Windows Store, certain files go missing. Along the way, the Windows Store cache files get damaged. You’re unable to retrieve preferences and Store history of previous user accounts and user profiles.
In any case, there are several ways to teach you how to fix Windows Store cache. When you see the Windows Store cache damaged, you can repair it right away, without seeking any professional technical support.
DID YOU KNOW?
In Windows 8, 8.1 and 10, the Windows Store is responsible for managing system updates. In earlier Windows versions, the Control Panel performed this function.
So, when you face the “Windows Store Cache May Be Damaged” error, you’ll be unable to download or update apps and other Windows services.
How to Fix Damaged Windows Store Cache Files – 9 Simple Ways for Windows 10
Before testing a rundown on how to fix “Windows Store cache may be damaged”, try restarting your computer. In most cases, Windows 10 users can fix the problem by a simple system reboot.
If the problem persists, here’s a step-by-step guide on each fix for the error “Windows Store cache may be damaged” (Windows 10):
1. Create New Account

Your Windows Store user account could stem this issue. It could be corrupted, and in turn could’ve damaged the cache files.
You need to create a new user account to fix the caches. In this case, the problem can be resolved in simple steps.
- Go to the Windows 10 Start menu and click on the “ Settings ” gear icon
- Navigate to Accounts and open the Accounts tab
- In the left pane, you see an option – Family & other people
- Click on it, and further click – Add someone else to this PC
- Choose – I don’t have this person’s sign-in information
- Click on “ Add a user without a Microsoft Account ”
- Enter the desired username
- Follow the Wizard to set up new user account
- Click on “ Next ” to finish setup
After you’ve created the new user account, use its username and password to log into Windows Store app. See if this has fixed your damaged Windows Store cache files.
2. Run WSReset.exe
There’s a technical way to fix this problem. You don’t need to use the Windows Store troubleshooter for this method.
You can run the WSReset.exe process and restore the MS Windows Store purge caches.
You’ll use the WSReset tool and resolve the error instantly. Here’s how:
- Go to the search dialog box next to Windows 10 Start menu button
- Type “ wsreset ” and hit the Enter key
- Open the process from the search results
- Wait for the process to execute and finish
- Restart your PC
Your reset changes are put into effect only when you restart your computer. After restarting Windows 10, open the Store app, sign-in with any Microsoft user account and try downloading the apps.
Now, try running updates for some apps. If the “Windows Store cache may be damaged” message doesn’t get displayed, you’ve successfully repaired the cache files.
3. Reset App Packages
Let’s address another method. If you think Windows Store cache and licenses may be corrupt, you can reset the built-in app packages.
This is a simple reinstallation procedure and allows the user to reset Store cache immediately.
To reset app packages,
- Go to the Start menu and look for Windows PowerShell program
- If you can’t find it, type “ powershell ” in the search dialog box
- Right-click on the Windows PowerShell program and select Run as Administrator
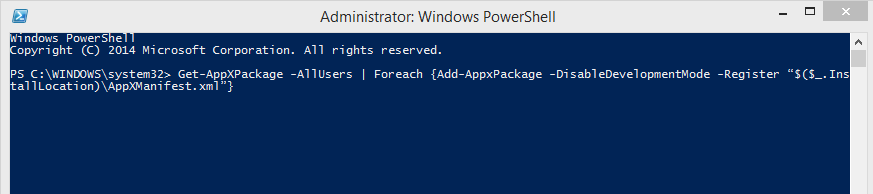
- After opening the PowerShell window, type the following command (use Ctrl + C, Ctrl + V, to copy-paste):
Get-AppXPackage -AllUsers | Foreach {Add-AppxPackage -DisableDevelopmentMode -Register “$($_.InstallLocation)\AppXManifest.xml”}
- Press the Enter key to execute this command
- After it finishes, restart your computer
Remember, do not open the Windows Store app after restarting. The solution doesn’t end here.
- Go to the Start menu and look for Command Prompt program
- If you don’t find it, type “ cmd ” in the search dialog box and press Enter key
- Right-click on the Command Prompt program from the search results
- Click on “ Run as Administrator ” from the dropdown menu
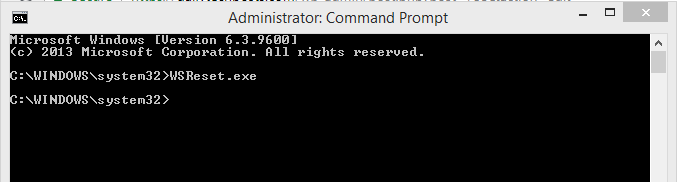
- After opening the Command Prompt window, type the following line of command
WSReset.exe
- Press the Enter key to execute
- Restart the PC after the process finishes
Now, you’ve successfully reset app packages. Hence, you can open the Windows Store and download/update apps successfully. Your Store caches won’t get damaged due to corrupted user licenses.
4. Check Region on Windows Store
There’s a chance that the preset region on your Windows Store app is causing this issue. If the solutions presented above aren’t helpful, you can try changing the region on the Windows Store app.
Fix the region with the following steps:
- Click on Start menu button on Windows 10
- Go to Settings gear icon and open Settings window
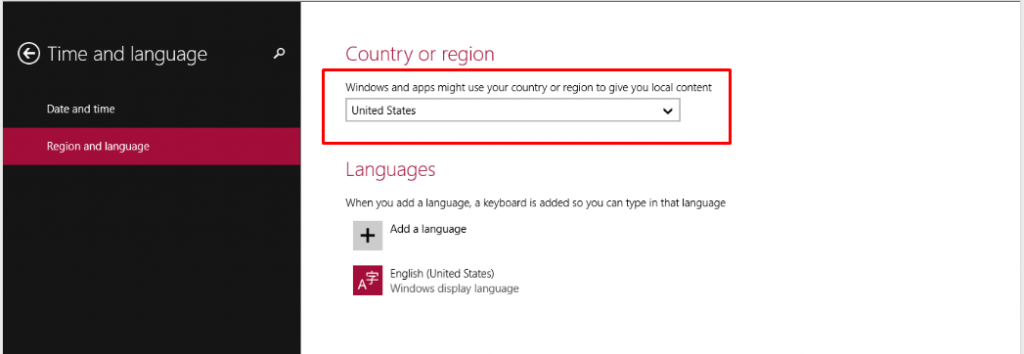
- Navigate to Time & language tab on the Settings pane
- Click on it to open
- Select ‘ Region & language ’
- Choose “ United States ” as the country or region
- Save changes
Now, restart your computer and open the Windows Store app. Check if the problem has been solved or not.
BEST PRACTICE
To avoid running into such errors, keep a check on yourantivirus software. Most Windows 10 users use third-party antivirus software that interferes with settings of different programs.
Windows Store cache may be damaged because of such software. Uninstall them to check if it fixes the problem.
5. Remove Other Universal Apps

According to a few users, the Windows Store cache may be damaged due to interference from universal apps. The Movies & TV app, in particular, could cause this problem.
You need to uninstall these apps. This is the simplest way to stop their interference and ensure Windows Store cache don’t get damaged.
You need to uninstall the Movies & TV app by using Windows PowerShell:
- Go to the Start menu
- Open Windows PowerShell by right-clicking on it and selecting ‘ Run as Administrator ’
- Paste the following command
Get-AppxPackage *zunevideo* | Remove-AppxPackage
- Press the Enter key to execute and finish
You need to restart the PC to make sure the uninstallation is put into effect. This can solve the problem in some rare cases.
6. Modify Privacy Parameters
Can changing privacy options on Windows 10 fix this problem? Yes, in some cases. Users have reported that damaged Windows Store cache files were fixed after changing privacy settings of the Windows account.
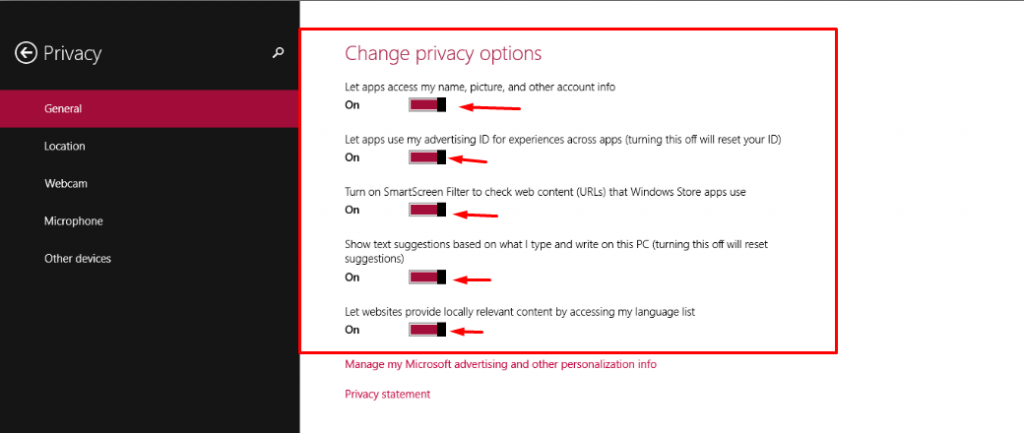
To change privacy,
- Go to Settings app on Start menu
- Open it and navigate to Privacy section
- Click on Privacy to open a new window
- You’ll see a list of options
- Toggle all options to “ ON ”
Return to your desktop and use Windows Store to see if the issue persists.
7. Reset Store Cache Manually
If the Windows Store continues to run into cache issues, resetting it can be a solution. Let’s try resetting Windows Store manually.
- Open the File Explorer window
- Go to the View tab
- Tick the box for ‘
- Go to the View tab
- Go to the View tab
- Paste the following address in the window’s address bar
C:\Users\<username>\AppData\Local\Packages\Microsoft.WindowsStore_8wekyb3d8bbwe\LocalState
- You’ll see the Cache folder from the LocalState folder
- Rename it
- Create a new ( empty ) folder in this destination
- Name it as ‘ Cache ’
Now, restart your Windows 10 PC to reset the Windows Store cache files. This solves the risk of damaging your Store caches files thereafter.
BEST PRACTICE
You can check for Windows Updates to fix the damaged Windows Store cache files. Open Settings app on Windows 10, click on Update & Security > Check for Updates .
Install the important updates, You can skip the recommended ones if your PC is running low on memory, Keep checking for Windows Update as frequently as you can.
8. Reset Window Store App
Your last option is to reset the whole application, You need to reset the Windows Store app from the Windows 10 Settings menu. This allows the operating system to re-run Windows Store and fix problems automatically.
Here’s how to go about it:
- Go to the Start menu
- Click on the Settings app (gear icon)
- In the Settings window, go to the Apps section
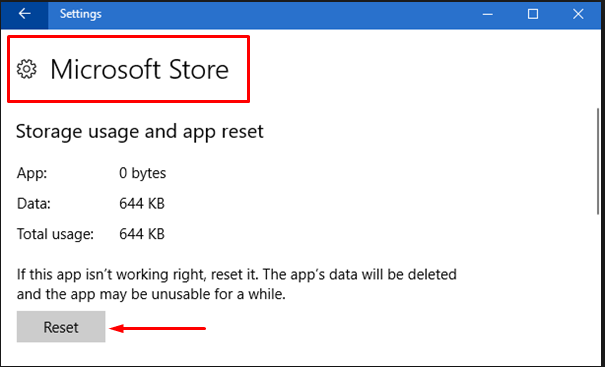
- Click on Microsoft Store from the list of apps
- Click on Advanced Options
- Hit the Reset tab
- You’ll see a confirmation prompt
- Click on the Reset button again to proceed
You’ve successfully reset your Windows Store app. This solution is not helpful in repairing/restoring Store caches for previous user experiences. However, it can certainly prevent the error in the days to come.
All in all, you can fix the “Windows Store cache may be damaged” error easily, These methods can help you avoid the error by trying them out whenever you see the error message.